Introduction
I decided to setup a clean work environment for my new project.
Here is basically what I did to setup my environment.
1. Install updates and basics
First thing is to do is always update the operating system.
sudo apt update
sudo apt upgrade
I always find that I need these programs installed.
sudo apt install build-essential wget curl ffmpeg p7zip-full p7zip-rar gnupg git rsync2. Install Proprietary drivers OR NOT
I do not recommend installing proprietary drivers. If your system is working fine, don't bother installing these. It may cause it to be unstable.
If your system is already unstable, you have a specific need, or you are just excited to try the Nvidia or AMD drivers.
- Open up Software & Updates and then the Additional Drivers tab. (I use the Application Finder - hot key Windows-R and then search)
- If you have drivers available you can try to install them. Be prepared for instability.

- If you have no drivers available (like above), you will need to download directly from AMD or Nvidia.
AMD 20.04 Drivers
Nvidia Linux/Unix drivers
3. Install your favorite Browsers
I like to install all of the browsers. It is much easier to reproduce a bug on a website, if you have the same browser as the user.
Install only what you will actually use.
- Firefox - This is installed by default
- Chromium
sudo apt install chromium-browser - Google Chrome
- Microsoft Edge Insider
- Opera
4. Install VLC
VLC will take care of basically all your media setup requirements. DVD codecs, video playing, etc.
sudo apt install vlc5. Install an image editor
-
GIMP, it is installed by default.
-
Pinta - My favorite editor. It is simple like MSPaint, but has many more features.
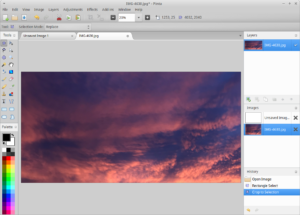
Pinta is outdated when installed from the standard repository. But it can be installed from the Pinta PPA.sudo add-apt-repository ppa:pinta-maintainers/pinta-stable sudo apt update sudo apt install pintaIf you have stability issues, you may want to update Mono and install mono-devel. This can be done from the Mono Project repository
sudo apt install gnupg ca-certificates sudo apt-key adv --keyserver hkp://keyserver.ubuntu.com:80 --recv-keys 3FA7E0328081BFF6A14DA29AA6A19B38D3D831EF echo "deb https://download.mono-project.com/repo/ubuntu stable-focal main" | sudo tee /etc/apt/sources.list.d/mono-official-stable.list sudo apt update sudo apt install mono-devel #Install development libraries sudo apt upgrade #Upgrade anything Mono related that is already installed -
Krita - It is designed for creating digital art.
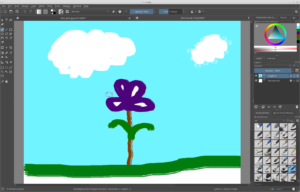
If I can do this, imagine what an artist could do!
sudo apt install krita
6. General CLI tools setup
I tend to use the terminal a lot. These are the primary tools I use
- Screen - This is a very useful CLI tool. It allows both managing multiple terminals at once and prevents processes from being killed if you are using screen on a remote server.
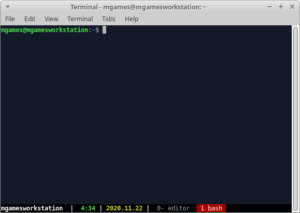
sudo apt install screenI recommend creating a .screenrc in your home directory. It is much easier to keep track of tabs this way.
hardstatus alwayslastline "%{b kw}%H %{r}%1` %{w}| %{g}%c %{w}| %{y}%Y.%m.%d %{w}| %{-b kw}%u %-Lw%{= rW}%50> %n%f %t %{-}%+Lw%<"
deflogin off
altscreen on
multiuser on
screen -t editor
screen -t bash
[Screen Hotkey Cheat Sheet](https://vhernando.github.io/gnu-screen-quick-guide-cheatsheet "Screen Cheat Sheet")
-
VIM - My favorite editor on the terminal. If you aren't familiar with vim here is a helpful [VIM Cheat Sheet](https://vim.rtorr.com/ "VIM Cheat Sheet").
sudo apt install vimAt this step, you can also set your default editor to vim.
git config --global core.editor "vim" -
FISH - My new default shell. It has better tab completion than bash and feels cleaner in general.
sudo apt install fish
chsh -s /usr/bin/fish
# Log out and log in to complete the change.
Set default editor in fish.
echo "set -gx EDITOR vim" >>  ~/.config/fish/config.fish
source ~/.config/fish/config.fish
7. SSH setup
If you are a developer, you probably use git. The ssh setup basically the same for GitLab, Github, bitbucket, etc...
[GitLab SSH key setup](https://docs.gitlab.com/ee/ssh/README.html#generating-a-new-ssh-key-pair "SSH key setup")
8. IDE setup
This is going to vary depending on the language you program in. [Visual Studio Code](https://code.visualstudio.com/docs/setup/linux "Visual Studio Code") is a good all around editor. [PyCharm](https://www.jetbrains.com/pycharm/download/#section=linux "PyCharm") is good for python. [Eclipse](https://www.eclipse.org/downloads/ "Eclipse") and [IntelliJ IDEA](https://www.jetbrains.com/idea/download/#section=linux "IntelliJ IDEA") are good for Java. I have yet to find a good free C/C++ IDE. So please leave a comment if you use one.
- Increase file watchers
Regardless of IDE you will want to increase the number of files that can be watched by that IDE.
Append this (or an appropriate number) to the end of /etc/sysctl.conf:fs.inotify.max_user_watches=524288
9. Python setup
My standard python3 setup uses pip and virtualenv.
sudo apt install python3-pip python3-virtualenv python3-dev10. Java Setup
I still deal with a lot of Java 8 projects ("tsk tsk bad developer! Just update!"). So I install Java 8 and the latest version.
Pick what versions you need to get your job done.
sudo apt install openjdk-8-jdksudo apt install openjdk-14-jdkIf you install multiple Java versions, use update-alternatives to set your default java and javac.
sudo update-alternatives --config java
sudo update-alternatives --config javac
11. Browser Tuning
There are a lot of options for each browser. This will be rapid fire.
- Password manager - LastPass is very popular, but I recommend doing research to find the most trustworthy and secure.
- Adblocker - The standards are uBlock Origin and Adblock Plus.
- Search Engine - Set your default search engine.
- History/Cookie Policy - Set how long you want cookies and cache to stay around.
- Browser Syncing - Set Firefox, Chrome, etc to sync without other installs of those browsers.
- Set languages - I prefer to read pages in their native language (if I speak it). Set this to stop automatic translations.
12.Setup a backup system
Whether you backup to the cloud or to an external drive, you need to set it up.
My typical method is to use rsync to copy important directories to a second computer.
Use whatever works for you.
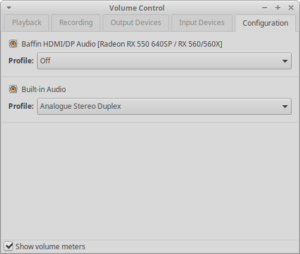
13. Disable unneeded audio devices
Nothing is more annoying then to join a conference call and discover your audio is set to use your hdmi port instead of your microphone.
- Launch the PulseAudio Volume Control app.
- Select your default input and output devices. Click the checkmark next to your desired default device.
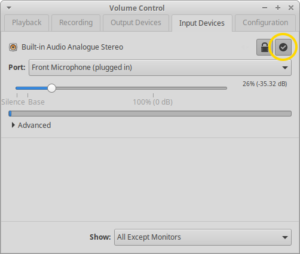
- Disable unwanted audio devices in the Configuration tab
14. Install your collaboration software.
It seems like each person I need to speak with uses a different tool. Here is the list I have had to use at one point or another.
- Microsoft Teams
- Discord
- Skype
- Zoom
- Google Hangouts (Only useable in browser on Linux)
15. Setup Printers
This will either be extremely easy to do or extremely difficult. This is definitely an exercise for the reader...
Conclusion
Setting up a development computer is unique for each programmer, especially in the Linux world. Do whatever works for you.
